Making the blades
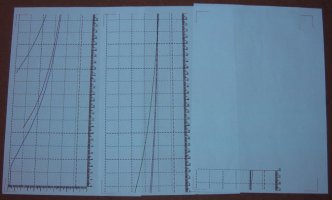
Print off the diagram in the previous page making sure the scales are the correct size. The print out will probably cover more than one page so these will need to taped or glued together. Adjust the page height and width in the form and the landscape and portrait options on the printer to minimise the number of pages you need to join. The thin red tick marks at the corner of the pages must align, as should the axis and curves. I found it easiest to cut away the excess paper on one page to see the joint between the pages. The pages can be taped together and once joined it is easiest to glue the diagram to a piece of thicker card so it is stronger and can be easily traced around later.

The very centre of the blade will probably need to be removed to avoid the axle or hub. Mark this on the diagram of the blade.
The inner part of the blade where it is bolted to the flat front of the hub will be blanketed and also be excessively wide to be practical. I just drew a smooth curve from the start of the blade joining the red line at a place just outside the hub that looked right. Avoid sharp corners or abrupt changes in width as this part of the blade will be under some stress.
If the root of the blade is to be bolted against the front of the hub then the position of these bolts should be marked on the red dotted line
Cut the blade diagram out along the red lines marking the straight trailing edge, the tip, the curve marking the length of the arc line and the smooth curve you have drawn at the root.

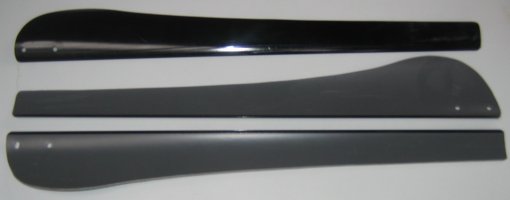
It is now possible to wrap the blade plan around the outside of the piece of PVC tube with the straight trailing edge along the axis and mark around the plan. I used semi circular PVC gutter which already had a straight finished edge. If you are using a complete tube it would probably be easiest to cut it into sections down the length so the straight edge is already finished. Tape and small spring clamps are useful to hold the template. Where you have marked the holes for the hub bolts, drill these through the PVC tube.
When you have marked one blade, repeat for the remaining blades.
- Use the plan to mark all the blades. Do not cut the first blade using the plan and then use this as the template for the rest. You end up with one correct sized blades and the rest will be smaller.
- Use the same side of the plan so all the blades rotate in the same direction.

I cut the blades from the PVC using a small jig saw or by hand using a fret saw.
They were cut slightly over size and then sanded back to the mark using a sanding drum mounted on a drill which left a clean finish.
The first blades I made I just sanded the leading and trailing edges round, like the blades in the photos.
Since making the data logger I've experimented with different blades to try to improve the performance.
Sanding the concave side of the blade so the trailing edge is sharp and the leading
edge has a slight round makes a measureable improvement in performace.
